Building The PDI-Japan M4 Patriot Kits
OptimusPrime
03 Oct 2008
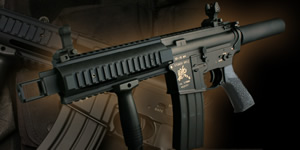
In the Popular Airsoft Magazine May 2008 issue, we were heavily into AEGs that are made for this type of airsoft combat. While we always think of CQB-Rs, MAEGs, SMGs, and Bullpups as the more appropriate tools for the trade, one overlooked item is the Patriot which is based on the M4 series. Many will find the Patriot at a first glance as an M4 AEG which went through an axe murderer's hands, which you can count us in. But over the period, we find Patriots getting more attractive, not just for providing the compact beauty for an M4, but the power of an M4 AEG in a smaller setup, a perfect tool in tight places.
Real steel Patriots are manufactured by the US-based Rocky Mountain Arms Inc. and were made for civilian use in 1993 until a ban on 1994 which limited production to law enforcement and military exports. By 2005 limited production was allowed for civilian users. As mentioned at the company website the “PATRIOT ® .223 pistol was the first AR format production pistol manufactured in the United States with both the lower and upper receiver machined from bar stock. The Milled flat top featured a picatinny rail for accessory mounting. Pistols were also made from cast and forged lowers to keep up with production demands.”
Looking around for Patriot Kits, you might think that converting your M4 into a Patriot M4 is an easy task, it's actually not for the faint-hearted. You'll need to hack your M4 receiver just to achieve this look and shorten your existing inner barrel. You'll invest in these and actually make them useless for another project if you tire out of your Patriot M4 and want to use your receiver for something else. Have the courage to actually sacrifice your M4 receiver for this, and permanently make the Patriot M4 a part of your personal airsoft armoury. You can only interchange the M4 receiver with another type of Patriot Kit, but for other standard M4 assault AEGs, forget it. Decide resolutely before delving into converting your M4 AEG into a Patriot M4.
PDI Japan, through the kindness of Tomo Nishizono, PDI Japan sales manager, sent us three PDI Patriot Kits to convert for our existing M4 rifles, which are are namely: Patriot 1 STD, Patriot 2 SLIT Type, and the Patriot 4 STD. All these kits are based on Tokyo Marui M4/M16 bodies, and as claimed at their website, these designs have not been tested for any other type of M4/M16 receivers made by other airsoft manufacturers. There will be more modifications needed if your base gun is not any of the Tokyo Marui M4/M16 models. So have the determination that you want to have your own Patriot M4 to conduct actual conversion.
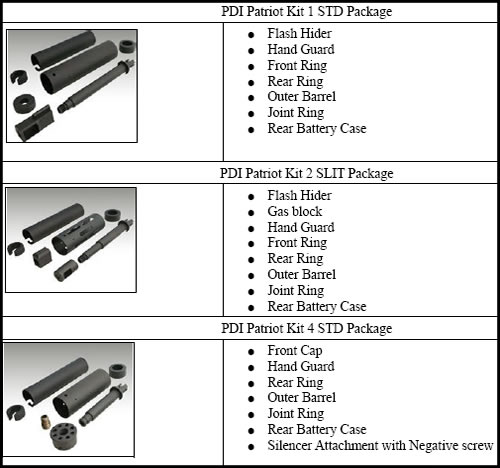
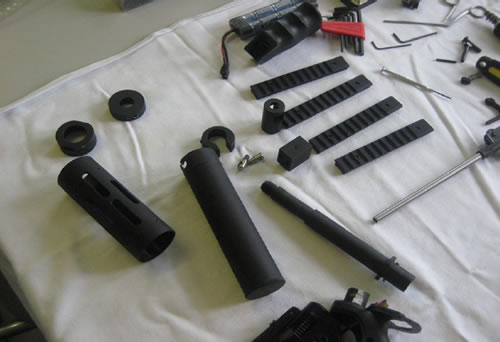
The inner barrels, front and rear sights, rails are to be purchased separately. PDI sent us these inner barrels and rails to complete our conversion. Patriot Kit 2 SLIT and Patriot Kit 4 STD share the same rail length. If you do not want to cut your own inner barrel from your existing M4 AEG the requirements for the inner barrels are 205mm for Patriot Kit 1, 187mm for Patriot Kit 2, and 141mm for Patriot Kit 4. The barrels can range from the standard 6.08 to a 6.01mm tight bore. But if you're looking into a high rate of fire, then you can consider between 6.08 to 6.05 inner barrels.
Obviously, the Patriot Kit 4 is the shortest among the lot. Patriot Kit 3 (also known as “Tornado”) is not available and we did not confirm if PDI has stopped production of this kit. All the kits are made of Duralmin and CNC'd and they are practically lightweight.
One issue that you will find in the PDI Patriot Kit Packages is that they come with a well printed manual but written in Japanese. We hope that this DIY guide will provide an English step-by-step howto in making the conversion.
MAIN STEPS IN CONVERSION
The steps below apply to all Patriot Kits in this tutorial.
1. Preparing for the Hack
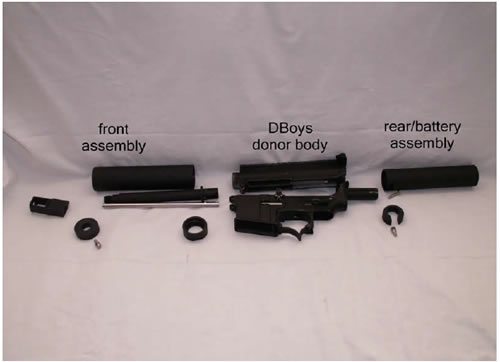
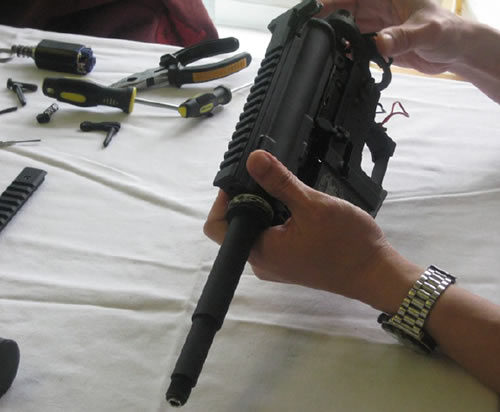
Besides the usual torx and allen screws. You'll need pliers, a tape measure/ruler, metal file, safety gloves, safety goggles, and a hacksaw in order to start the conversion process. Furthermore, have a table and a dust cover as a work area as there will be metal fillings when sawing and filing off parts of the receiver. We have sacrificed a Guarder and two (2) Dboys M4 Metal receivers for this process, and downgraded our springs for a 1-joule (328fps) power in order for us to fully utilise these kits in CQC airsoft sites.
The Dboys M4 metal receivers are good for this project, besides being low-cost, they are TM-compatible, and a selection of markings can be made from your favourite retailers such as RSOV.com and Gunner Airsoft. You can purchase the Guarder M4 Body from UN Company if you have more to spend like Bulletproofmike. You can have good cosmetics with your Patriot M4s besides the well-built PDI Patriot kits made of tough, but lightweight material.
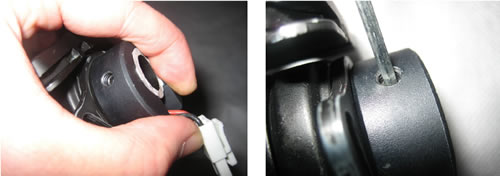
2. Open and Rewire The Gearbox
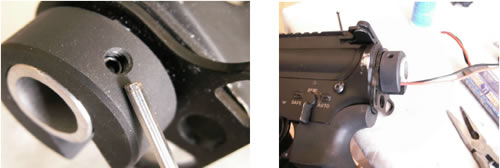
If you have a Version 2 gearbox that has its wiring for the batteries in the rear, you're actually in luck, you do not have to do some rewiring. But many M4 AEGs have version 2 gearboxes wired to the front. But this should not discourage you from proceeding with the conversion. Just proceed to opening up the gearbox and you'll discover that there is a wiring guide to reorient the gearbox wiring for battery installation in the rear (which usually means for crane-stock batteries). Just rewire following the wire guide, do some cleaning and greasing (but not too much) of your gears before you lock-up your gearbox.
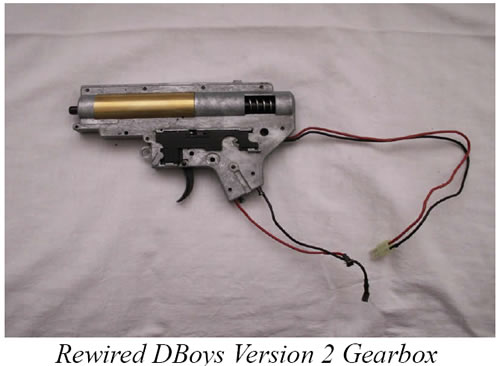
After doing this, set your gearbox aside, the fun part is just about to start.
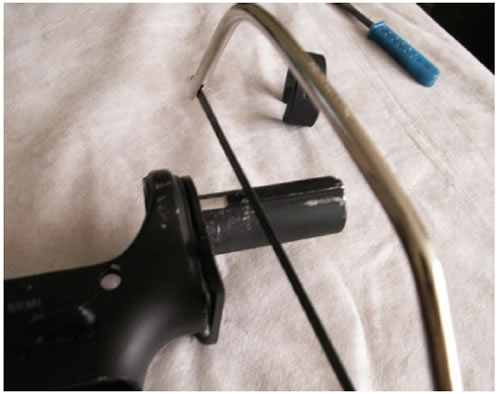
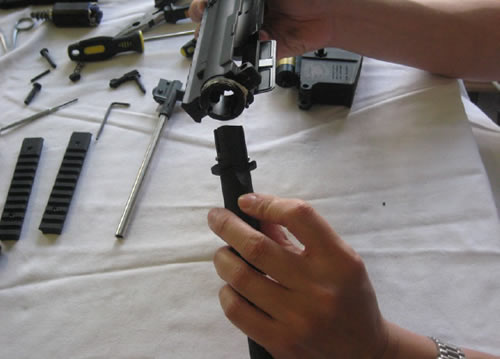
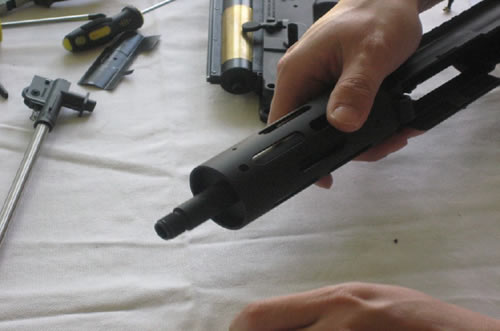
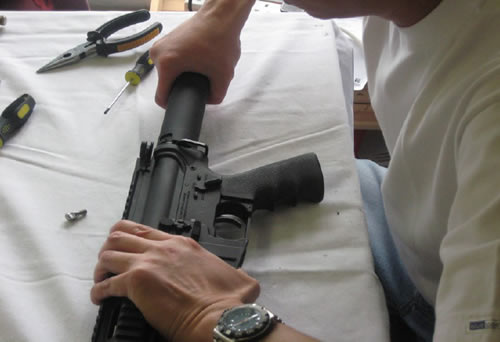
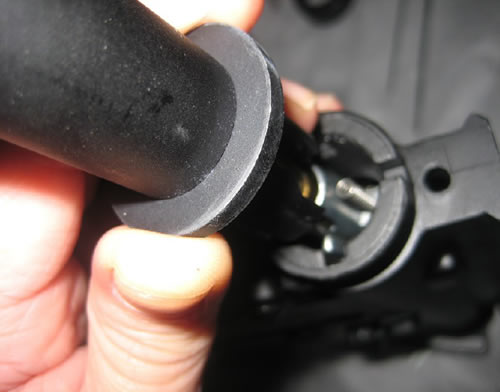
3. Hacking the M4 Metal Body
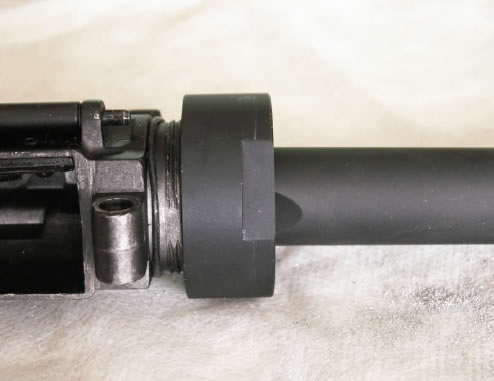
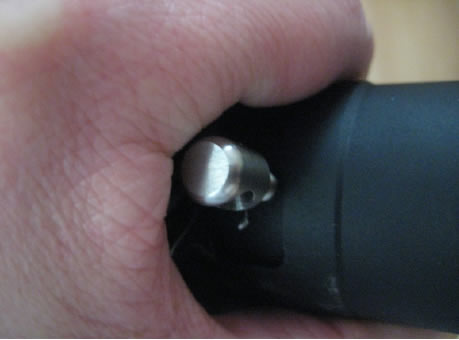
Now you'll start doing some radical surgery on your metal body. The stock tube on the rear needs to be shortened as the rear battery case provided in the conversion kit will use the shortened tube to accept an 8.4v to 9.6v Battery. Grab a ruler and mark 1.5 centimetres from the base of the rear of the receiver which is the actual length of the kits' rear rings or up to 1.7 centimetres to allow for the installation of a rear sling plate (not included in the package). The mark is where the remaining part of the stock tube that should be sawed off.
Take out the hacksaw and saw off the stock tube at the marked area. Please make sure you're wearing safety gloves to prevent cuts and abrasions to your hands when there's you slip, and safety goggles to avoid minute metal fillings to get in your eyes.
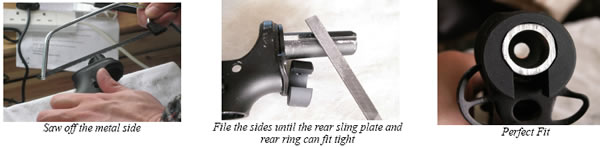
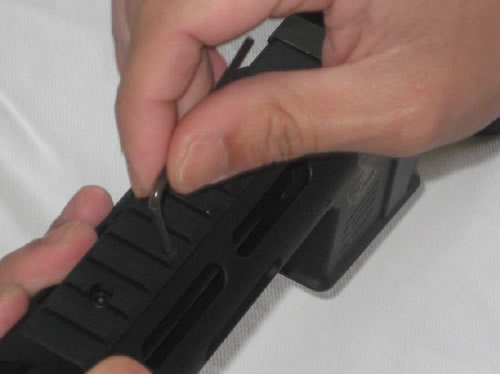
While sawing off manually and without power tools, you might produce an uneven surface. Do not worry about this as you can file this off to have an even and smoother surface after sawing the indicated parts of the stock tube. There is still an important part in the sawing off part.
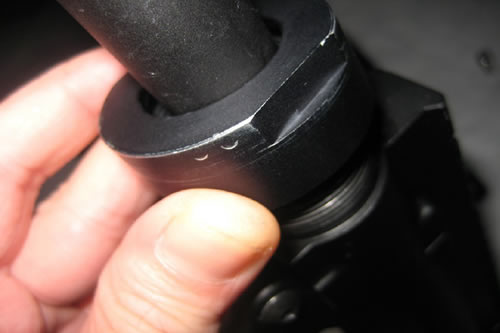
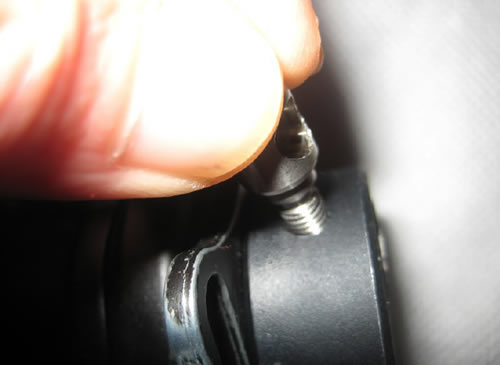
The sawing part is not over yet as you'll need to saw off the sides of the tube to allow for insertion of the rear sling plate and the rear ring. The rear rings of the conversion kits are perfectly round and they cannot be installed into the stock tube immediately. You'll saw off the protruding metal sides of the stock tube and file them off until the rear sling plate and the rear ring can now be properly fitted to the tube. Do not install yet the battery tube, that will be the last part in the conversion.
File off the uneven surfaces until you are satisfied. Just do not over do it as you may just cause a loosened rear ring installation. Make sure that it will be a very tight fit.
After achieving a perfect fit for the rear part of the metal body, you can assemble the metal receiver for the fast track conversion. Install the: a) gearbox; b) hop-up unit; c) inner barrel; d) pistol grip; and e) the AEG motor (or you can do this later on as seen on the steps per Patriot Kit). Make sure that the rear wires of the gearbox are protruding outside of the rear of the receiver.
Note: If you did not purchase the inner barrels for the Patriot Kits from PDI, you can saw off your existing inner barrels according to the following lengths: 205mm for Patriot Kit 1, 187mm for Patriot Kit 2, and 141mm for Patriot Kit 4.
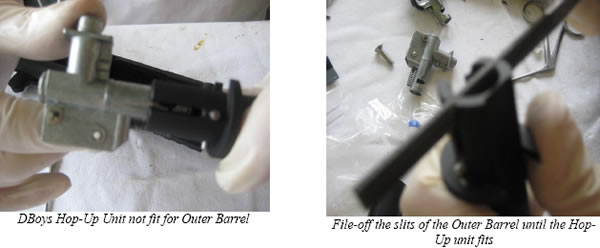
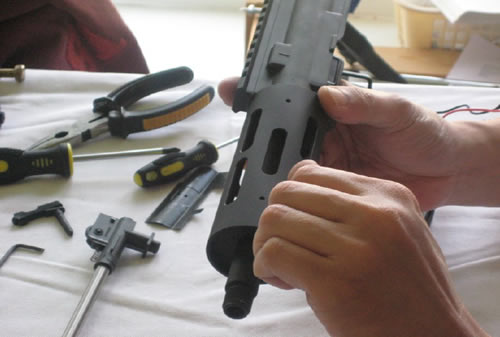
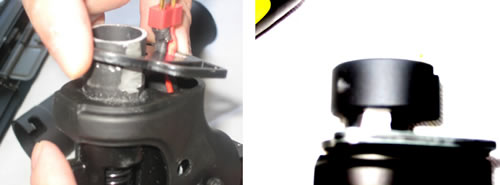
4. Check if Hop-Up Unit fits with Outer Barrel
As the Patriot Kits' outer barrels are designed for TM hop-up units and thus, your hop-up unit may not actually be a good fit for the outer barrel. This happened with the Patriot Kit 4 STD with the DBoys Hop-Up unit. File off the slits of the outer barrel until the hop up unit fits.
Now, everything can assembled fast. Disassembling and reassembling the Patriot Kits can be made in under three to five minutes once you get used to it (without receiver takedown and reassembly).
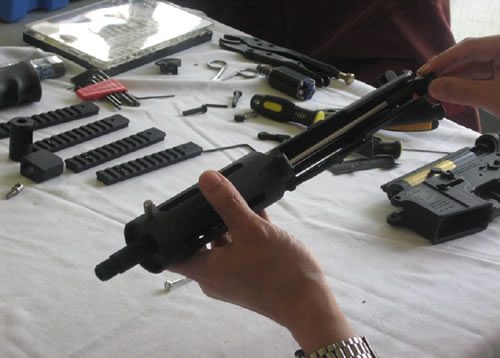
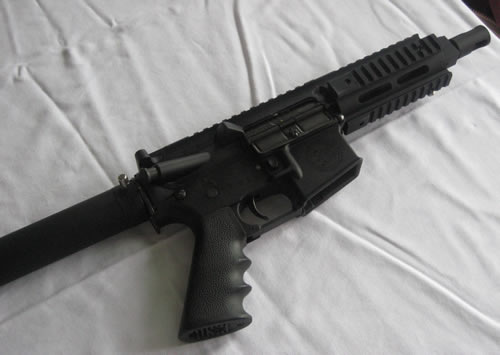
Patriot 1 STD Assembly (Body: Dboys M4 Metal)
1. Install The Outer Barrel

2. Install the Joint Ring and lock the outer barrel to the receiver
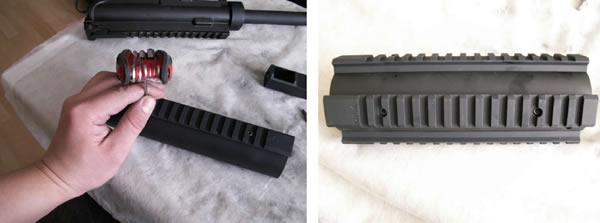
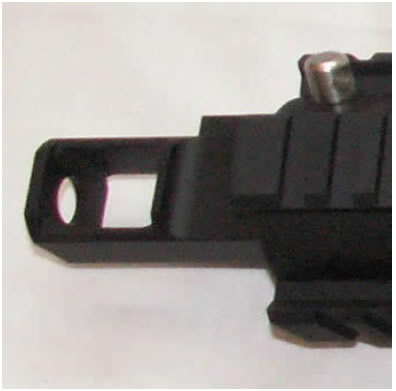
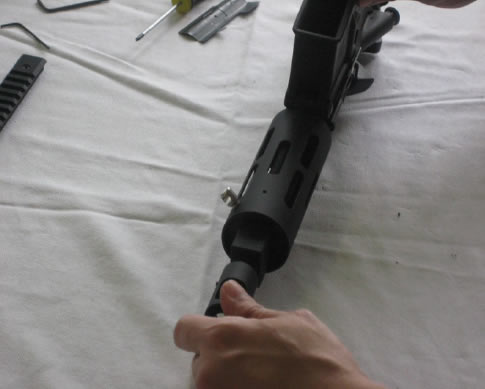
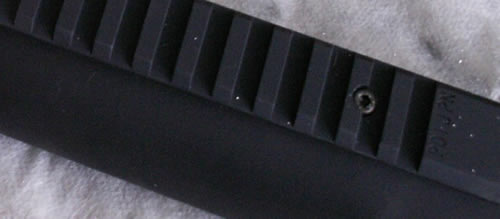
3. Install the RIS Rails To the Handguard (or you can do this after installing the handguard).
4. Install the Handguard to the Joint Ring and put the Front ring by screwing these down with the screws provided in the package
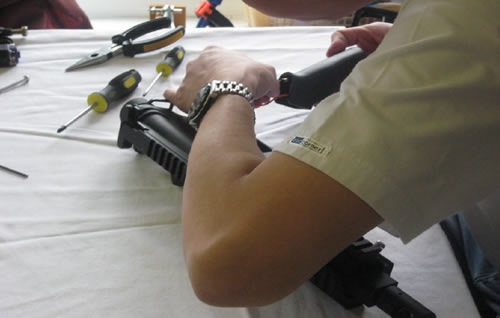
5. Install the Flash Hider and assemble all the parts of the receiver (Inner Barrel, Hop-up, Gearbox, Pistol Grip, and Motor).
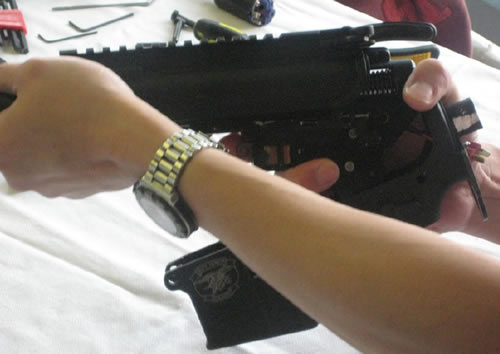
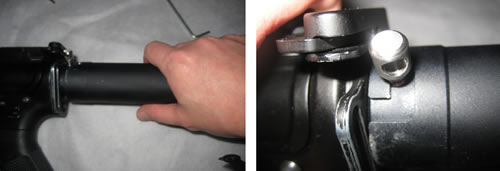
6. Install rear sling plate and the Rear Ring to the Receiver and use the provided screw to secure this down with an allen key. The wires should be protruding out into the open.
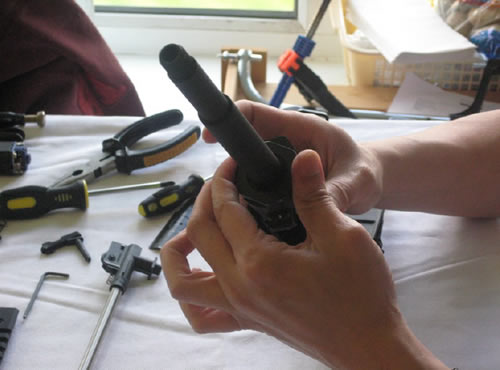
7. Install the rear screw provided in the package and install the battery tube. Twist the battery tube until it locks to the screw.
8. You're done. (Install an 8.4v or 9.6v mini battery and test the AEG)
Patriot 2 SLIT Assembly (Metal Body Used: Guarder M4 Metal Body)
1. Install the Outer Barrel to the receiver
2. Lock the outer barrel and receiver together with the joint ring
3. Install the Handguard and Front Ring
4. Lock the handguard and front ring with the screw provided
5. Install the Inner Barrel and Hop-Up Unit
6. Install the gearbox
7.Close the gearbox and ensure that the wires to the battery and motor are protruding
8. Install the rear sling plate and outer ring to the stock tube and use the allen key to screw firmly the rear ring
9. Attach the gas block and flash hider
10. Install the pistol grip and secure the wires to the AEG Motor
11. Attach the battery tube to the rear and secure it with the screw provided in the package
12. Install the rails to the handguard
13. You're done. (Just test the unit if it fires properly)
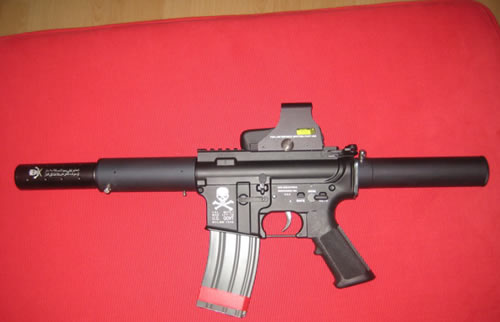
Patriot 4 STD Assembly (Body: Dboys M4 Metal with Skull Markings)
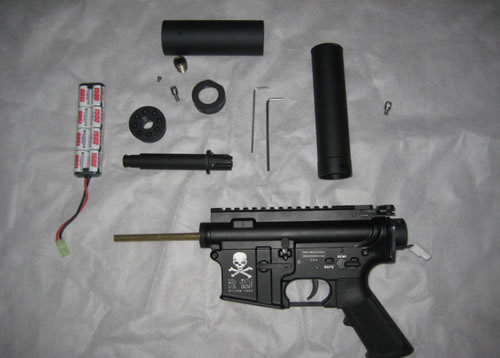
1. Attach the outer barrel to the receiver
2. Lock the outer barrel to the receiver using the joint ring
3. Install the handguard and secure it to the joint ring using the screw provided in the package
4. Install the Front Cap and secure it with the screw provided in package

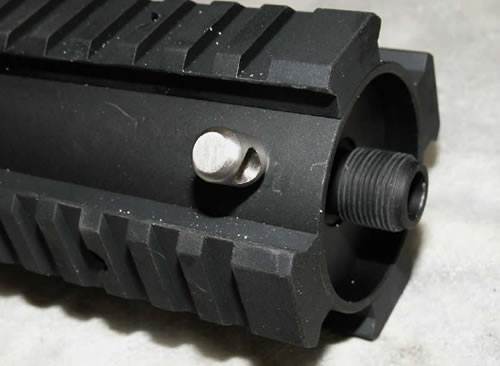
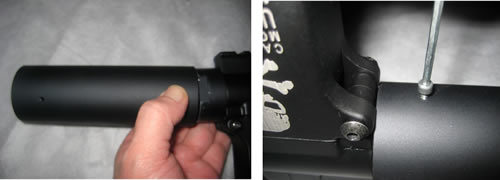
5. Attach the silencer attachment if you intend to put a suppressor (CCW thread)
6. Attach the rear ring to the receiver and secure it with the screw provided in the package
7. Install the screw lock for the battery tube
8. Attach the the battery tube to the receiver and secure by twisting until it locks into the screw
9. Install the RIS Rails to the Handguard and you're done.
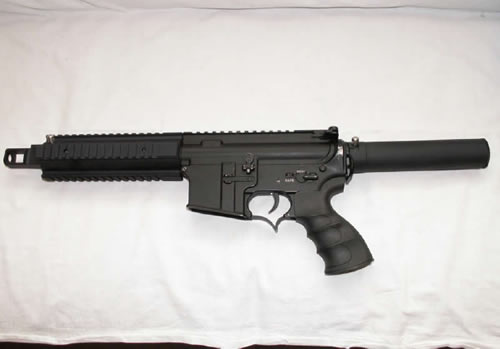
10. We installed an Element Stubby Silencer (G&P model won't fit), removed the RIS rails and we love the look!
Our Conclusion
You'll ask us if it's worth the hassle of making the modifications to accommodate the PDI Patriot Kits. We'll definitely answer that it is. We like how the newly-assembled Patriot M4s look like, and with Japanese mechanical precision and build quality, the Patriots are something we would put through the rough and tumble of a CQC melee. While the initial assembly was really tedious, it is actually what is expected when you're doing an airsoft conversion project. If you are an impatient lot, better get a fully customised Patriot M4 from a professional airsoft gunsmith. There is actual mixed anxiety and joy as we saw the Patriots slowly building up, all the tiredness were dissipated after we completed the kits.
While there are existing Patriot kits from Mad Bull and ICS, we haven't tested these and we have noticed that PDI Patriot kits are something of a rarity as they're always out of stock, a testament of their popularity among intermediate and advanced airsoft players.
Do we miss our old M4s that were gutted for the conversion project? No, not at all. They can rest in airsoft heaven.